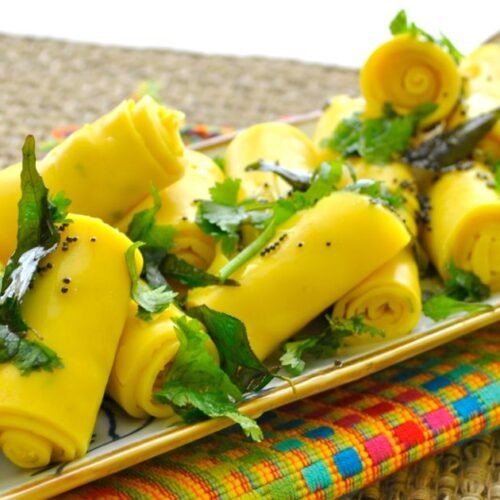
KHANDVI (FINE)
Khandvi is a soft, melt in themouth, spiced and seasoned gram flour rolls. A favorite snack from the Gujaraticuisine.
Ingredients
For Khandvi Batter
- 1 cup besan (gram flour) or 100grams besan
- ¾ cup sour curd, about 150 grams (dairy or vegan curd)
- 2.25 cups water, to be mixed with the curd (alternatively you can also use 3 cups sour buttermilk or chaas)
- 1 teaspoon ginger + green chili paste, about ½ inch ginger & 1 green chili crushed in a mortar-pestle
- ¼ teaspoon turmeric powder
- ⅔ teaspoon salt or add as required
- 1 pinch asafoetida (hing)
For The Filling
- 2 tablespoons fresh grated coconut
- 2 tablespoons chopped coriander leaves
For The KhandviTempering/Seasoning
- 1 tablespoon oil
- 8 to 10 curry leaves
- 1 teaspoon mustard seeds
- 2 teaspoons white sesame seeds
- 1 teaspoon green chili , chopped or ½ red chilli powder
Instructions
Making KhandviBatter
- Take the yogurt in a bowl. Add water and stir well till smooth.
- Add ginger-green chili paste, turmeric powder,asafoetida and salt.
- If using fresh yogurt, then to add the sourness, add about ½ tsp of lemon juice.
- Add the gram flour/besan. With a wired whisk, keep on stirring and mixing till all the lumps are dissolved and you get a smooth batter. There should be no lumps in the batter. You can also use a hand held beater to mix the batter.
- Spread oil on plates or boards or tray. Large steel lids or thalis work very well. You can also use the back of a large baking tray or your kitchen counter top.
- Also mix the chopped coriander leaves and grated coconut. Keep aside.
- Pour the batter in a sauce pan or a broad frying pan. Switch on the stove top and keep the flame to the lowest. Begin to stir.
- Keep on stirring when the khandvi batter is getting heated up. Lumps begin to form and you have to continuously stir so that the lumps don't form.
- The batter would thicken and keep on thickening. Keep on stirring. Best to use a wooden spatula or a heat proof silicon spatula.
- The batter also should not be allowed to stick atthe bottom. So you have to stir continuously
- Do a plate test when the batter has thickened well.
- Spread a few teaspoons of the batter on a greased plate. Let it cool a bit and then begin to roll. If you are unable to roll, then the batter needs to be cooked more.
- The final consistency of the khandvi batter is shown in pic 17 below. It took me 17 minutes to get the correct consistency on a low flame. The timing will vary depending on the intensity of the flame, the thickness/thinness of the pan and the size of the pan. Just do the plate test and when you can form the rolls, then the khandvi batter is ready. If the batter becomes too thick, then it becomes difficult to spread and you don't get thin layers in the rolls. In this case, still spread the batter. You will get thick slices, but still they taste good.
Making KhandviRolls
- Quickly pour about ½ to ⅔ cup of batter on a large plate and spread thinly & evenly with a spatula. You have to be quick with the remaining batter too. Since even a bit of cooling and the batter becomes likes blob, difficult to spread.
- Allow to cool and then sprinkle the coconut + coriander leaves mixture sparingly. You can also skip this stuffing part and directly garnish with the coconut and coriander once you temper the khandvi rolls.
- Cut into equal sized strips.
- Gently roll each strip tightly. Then place them in a serving tray or plate.if the tray or plate is large, then you will get large rolls. In this case after you finish rolling half, just cut horizontally and make a second roll.
- Arrange the khandvi rolls next to each other or stack them up neatly in a plate or tray.
Tempering (Seasoning) ForKhandvi
- Heat oil and crackle the mustard seeds.
- Then add curry leaves, green chilies and fry for a few seconds.
- Add the sesame seeds and when they change color & crackle, pour the hot tempering mixture along with the oil on the khandvi rolls evenly.
- You can garnish it with some more coconut andcoriander leaves, if you prefer. Serve khandvi with corianderchutney or coriander mint chutney